
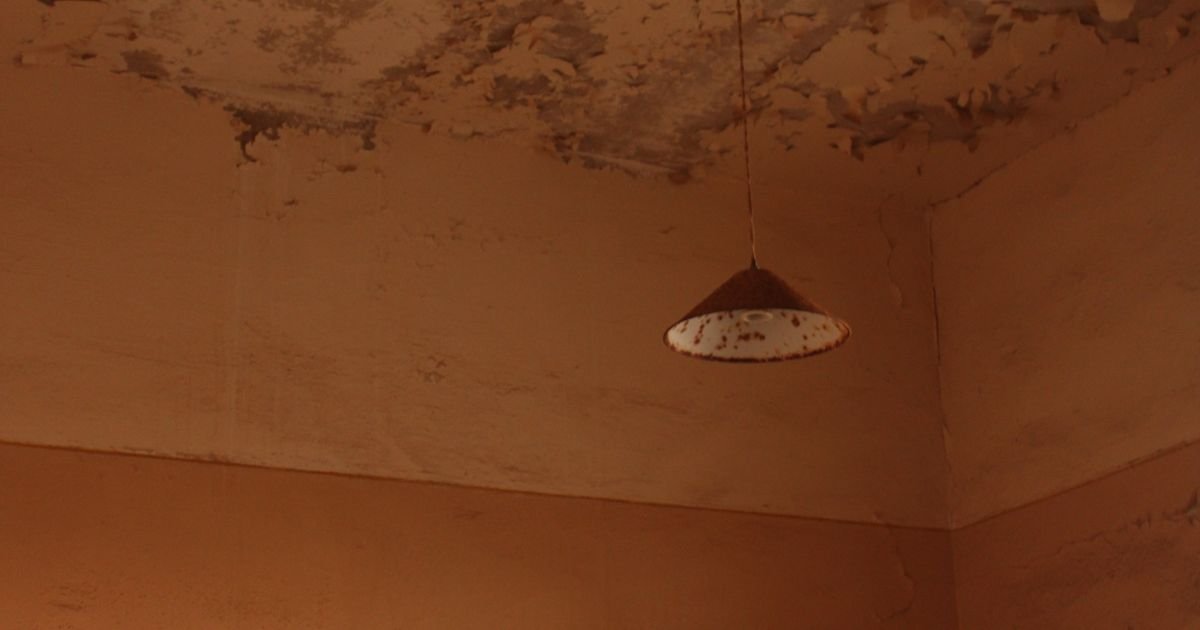
A brown stain on the ceiling is the roof telling you it has already failed somewhere. The stain is almost never directly below the hole. Water gets in at a high point, rides along the underside of the decking or down a rafter, and drips out several feet away from where it entered. That is why the first job with a leaking roof is not patching the stain. It is tracing the water back uphill to the real entry point.
The second job is speed. A minor leak caught early costs $150 to $1,000 to fix, according to HomeGuide cost data from February 2026. The same leak left alone can reach $3,000 to $6,000 once water has soaked the decking, ruined insulation, and started mold. Mold can begin growing in damp building materials in 24 to 48 hours, according to the US Environmental Protection Agency, so a drip that looks small on Monday can be a much bigger repair by the weekend.
This guide covers the 7 causes behind almost every leaking roof, what each one costs to fix in 2026, how to trace the source from the attic, what to do in the first hour, and how to decide between a repair and a full replacement. It is the pillar guide for the Repair and replacement cluster, so it goes deeper than the quick fix pages: it also covers the leaks that are not leaks at all, and the insurance paperwork that decides whether a claim gets paid.
How Much Does It Cost to Fix a Leaking Roof in 2026
Cost depends on two things: what failed, and how much water damage it caused before anyone noticed. HomeGuide puts most single leak repairs at $100 to $1,500 depending on the source, and Angi puts the average professional repair at $360 to $1,550. A simple do it yourself fix, such as resealing a vent boot, can cost as little as $10 to $120 in materials.
| Leak severity | Typical cost | What it usually means |
|---|---|---|
| Minor leak, no water damage | $150 to $1,000 | One failed detail, caught early |
| Moderate leak, some water damage | $1,000 to $3,000 | Wet insulation, a section of decking, stained ceiling |
| Major leak, structural or interior damage | $3,000 to $6,000+ | Rotted decking, framing repairs, mold remediation |
| Full roof replacement | $5,700 to $16,000 | Average home, asphalt shingles, HomeGuide range |
Most roofers also charge a minimum service fee of $150 to $300 even for a small job, and emergency call outs add about $200 to $300. A tarp over the damaged area costs $1.00 to $2.80 per square foot until the permanent repair is done.
The cost by cause is where the numbers get useful, because the stain on your ceiling points at a likely culprit, and each culprit has its own price range. All figures below are HomeGuide 2026 national averages, and all vary by region, roof pitch, height, and access.
| Leak cause | Typical repair cost |
|---|---|
| Cracked pipe boot | $250 to $600 |
| Roof vent flashing | $100 to $500 |
| Chimney flashing, minor work | $150 to $700 |
| Chimney flashing, major work | $1,000 to $3,500 |
| Leaking valley | $300 to $1,500 |
| Nail pops | $200 to $500 |
| Missing shingles, up to 25 | $100 to $300 |
| Skylight leak | $225 to $800 |
| Ice dam removal | $350 to $1,500 |
| Ice dam leak repair and restoration | $1,500 to $5,000+ |
| Redecking a damaged section | $500 to $2,500 |
If the quote for a repair climbs past $3,000, or the roof is more than 20 years old, ask for a replacement quote at the same time. Comparing the two numbers is the only honest way to decide, and the repair or replace section below walks through the exact decision rules.
The 7 Most Common Causes of a Leaking Roof
Almost every leaking roof traces back to one of seven problems. Flashing and shingle damage cause most leaks. Pipe boots are the single most common culprit on roofs between 10 and 15 years old, because the rubber collar around a vent pipe dries out and splits long before the shingles around it wear out.
1. Damaged or Rusted Flashing
Flashing is the thin metal that seals the joints where the roof meets a chimney, a wall, a skylight, or a valley. Over time it rusts, bends, or pulls away, and the sealant around it cracks. Chimney and wall flashing fail more often than any other roof detail because they sit at a joint where two materials expand and contract at different rates.
The clue is a leak near a chimney, a dormer, or an exterior wall, often worse in wind driven rain. Our guide to counter flashing explains how the metal set into the chimney masonry works with the step flashing below it, and the apron flashing guide covers the wide sheet that sheds water at the base of a chimney or wall. A chimney cricket is the small peaked diverter that keeps water from pooling behind a wide chimney, and a missing one is a common reason a chimney leak keeps coming back.
2. Cracked, Curled, or Missing Shingles
Asphalt shingles last about 15 to 30 years depending on type. As they age, granules wear off, edges curl, and tabs crack. High wind can tear a shingle away completely and expose the underlayment, which is not meant to handle water for long. Hail can crack the shingle mat without removing any pieces, so the roof can look fine from the ground and still leak.
The clue is a leak after a windstorm, or shingle pieces in the yard. Replacing up to 25 shingles costs $100 to $300. If shingles are curling or losing granules across large areas, the leak is a symptom of a roof near the end of its life, not a single bad shingle.
3. Cracked Pipe Boots and Vent Seals
Every plumbing vent and exhaust pipe that passes through the roof has a rubber or neoprene collar. These collars crack under sun exposure, often within 10 to 15 years. The crack is tiny, so the leak may show only in hard rain, and the stain often appears near a bathroom or kitchen ceiling, directly below the vent pipe.
This is the cheapest common fix and the first thing a good roofer checks on a single point leak. Replacing a cracked pipe boot costs $250 to $600. A metal gas vent collar failure costs more, $400 to $1,500, because the collar and the surrounding flashing both need work.
4. Clogged Gutters and Debris
When gutters fill with leaves, water backs up under the lower shingle courses and soaks the fascia and the roof edge. Valleys packed with debris cause the same problem in the middle of the roof, where water overflows sideways under the shingles. The clue is water along an exterior wall, or stains at the top of an outside wall, after heavy rain.
Cleaning the gutters is the fix, and it costs $150 to $300 for a professional cleaning. Left alone, the backed up water rots fascia boards and soffits, and that repair runs $1,000 to $2,500.
5. Ice Dams
In cold climates, heat escaping from the attic melts snow on the upper roof. The meltwater runs down, refreezes at the cold eaves, and forms a ridge of ice. Water then pools behind the ridge and is forced up under the shingles. Poor attic insulation and ventilation are the underlying cause, not the snow itself.
The clue is a leak at the eaves in winter only, or stains that appear during a thaw and vanish in summer. Removing the ice costs $350 to $1,500, but the real fix is insulation and ventilation work that stops the dam from forming again. Our guide to roof underlayment covers the ice and water shield membrane that protects the eaves when a dam does form.
6. Exposed or Popped Nails
Nails back out of the decking over time as the wood expands and contracts with temperature and moisture. A popped nail pushes up the shingle above it and creates a small opening. Nails driven too high or too low during installation do the same thing. Each exposed nail head is a possible leak point, and a roof can have dozens of them.
The clue is small drips in many spots rather than one steady leak. Fixing nail pops in a small area costs $200 to $500. A widespread nail problem points to an installation issue, and it is worth a full inspection before paying for spot fixes that will not hold.
7. Age and Wear
Once a roof passes its expected lifespan, leaks tend to appear in several places at once. Brittle shingles, bare patches, and failing sealant all contribute. Repeated patching at this stage costs more over time than replacement, because each repair buys months while the rest of the roof keeps aging.
The clue is several stains across the ceiling, or a leak that returns in a new spot a few months after the last repair. See the repair or replace section below for the age thresholds by material.
Is It a Leak or Condensation
Not every drip from a ceiling is a roof leak. Attic condensation looks exactly like a leak, and it fools homeowners and some roofers. Warm, moist air from inside the house rises into a cold attic, condenses on the underside of the decking, and drips onto the insulation and ceiling below. The stains it leaves are often spread out, near the eaves, or along the edges of the ceiling rather than in one spot.
Three signs point to condensation instead of a leak. First, the dripping happens on cold, clear mornings with no rain, or in winter when the house is heated and the attic is cold. Second, the underside of the decking looks wet across a wide area rather than along one trail from a single entry point. Third, the insulation is damp in patches with no stain trail leading up to a penetration.
Condensation is a ventilation and insulation problem, not a roofing problem, and patching shingles will not fix it. It needs balanced intake and exhaust ventilation, sealed air leaks from the living space into the attic, and insulation that keeps the attic floor warm. If the attic smells musty and the decking is wet on a dry day, get a ventilation check before authorizing any roof repair.
How to Find the Source of a Roof Leak
Finding the source takes more time than fixing it, so be patient and expect the process to take an hour or more. The method below is the one roofers use, and it works because it follows the water instead of guessing.
Start in the attic, not on the roof. Go up with a strong flashlight during rain or soon after, and walk only on the joists. Start above the ceiling stain and look uphill for wet wood, dark streaks on the rafters, damp insulation, or daylight coming through the decking. Water enters at a high point and runs downhill along the rafters before it drips, so the entry is usually higher than the stain and often to one side. Follow any wet trail uphill until it stops. That is where the water is getting in.
Check every penetration above the stain. Vent pipes, exhaust fans, the chimney, and the skylight well cause most leaks, so check them first. Look for daylight around the pipe, rusty nail tips, cracked sealant, and a rubber boot that has split or pulled away from the pipe.
Measure from the stain. If the attic shows nothing clear, measure the stain position from two walls inside the house, then transfer those measurements to the roof outside. The nearest penetration uphill from that point is the most likely culprit.
Use the hose test. If you still cannot find it, a helper runs a garden hose on the roof while you watch in the attic. Start low and work upward one section at a time, soaking each area for about 10 minutes before moving on. When water appears in the attic, you have found the section. Never run the hose test alone, and never climb a wet roof to do it.
Read the stain like a map. Where the leak shows inside the house narrows the cause before anyone climbs a ladder.
| Where the leak shows | Most likely cause |
|---|---|
| Ceiling stain near a chimney | Chimney flashing or crown |
| Stain near a bathroom or kitchen | Cracked pipe boot |
| Wet spot below where two slopes meet | Valley flashing or debris |
| Water along an exterior wall | Clogged gutter or wall flashing |
| Drips at the skylight well | Skylight seal or flashing |
| Stains after snowmelt in winter | Ice dam |
| Several stains across the ceiling | Aged shingles, roof near end of life |
| Stains only in heavy or wind driven rain | Lifted flashing or loose shingle |
| Wet attic decking on a dry, cold day | Condensation, not a leak |
A ground level check with binoculars can confirm the obvious suspects: missing shingles, lifted flashing, and sagging areas, all without climbing. If the stain is growing, the ceiling is sagging, or water is near a light fixture, skip the detective work and move to the emergency steps below.
What to Do in the First Hour
A leak is urgent, but it is not a reason to climb a wet roof. Work from inside first, in this order.
1. Turn off the power if water is near electricity. If water is dripping near a light fixture, a ceiling fan, or an outlet, switch off that circuit at the breaker. Do not touch a wet switch or fixture.
2. Catch the water. Put a bucket under the drip and a towel in the bottom of the bucket so the drip does not splash. Empty the bucket often so it does not overflow onto the floor.
3. Protect what is underneath. Move furniture, rugs, electronics, and boxes out of the drip zone. Cover what cannot be moved with plastic sheeting.
4. Drain a bulging ceiling. If the ceiling is sagging with trapped water, put a bucket under the lowest point and poke a small hole there with a screwdriver. A controlled drain is far better than a ceiling full of water coming down on its own. Stand to the side while you do it.
5. Take photos and short videos. Photograph the drip, the stain, the ceiling, and the date and time. Keep them together in one folder. These records matter for an insurance claim, and they help the roofer diagnose the problem before arriving.
6. Stay off the roof. Wet shingles are slick, and you cannot find the source in the rain anyway. Call a roofer, and if water is coming in fast, call an emergency roof repair crew rather than waiting for the next business day.
Temporary Fixes That Buy You Time
A short term patch keeps interior damage from growing. These steps are meant to last days or weeks, not replace a real repair.
Tarp the damaged area. Cover the damaged section with a heavy tarp that extends at least 4 feet past the damage on every side, and secure it under the shingles above or with wood battens. Never nail through the middle of the tarp. Only put a tarp up if it is dry and calm and you can do it safely from a ladder at the edge, or have a roofer do it. Never climb a wet, icy, or steep roof.
Seal small cracks on a dry surface. Roofing cement on a small crack or an exposed nail head can stop a drip when the surface is dry. It is a band aid, not a repair, and a thick smear of sealant over a failed flashing detail can make the real fix harder by hiding the problem and trapping water underneath.
Replace a slipped shingle. If a single shingle has slipped out of place and the roof is dry and walkable, sliding a replacement into place with roofing cement under the tab can hold until a roofer arrives. Do not attempt this on a steep roof, a wet roof, or a roof you cannot reach safely from a ladder.
Do not use caulk as a substitute for flashing. Caulk and roofing cement fail under sun exposure in a few years, and a bead of caulk across a flashing joint will crack and leak again. They buy time. They do not fix flashing.
How to Fix a Leaking Roof
Once the source is known, the fix depends on what failed. The three repairs below cover most single point leaks, and they are the jobs a handy homeowner can do on a dry, low slope roof with a helper nearby. Everything else belongs to a roofer, and any roof work should wait for dry weather and a forecast with no rain.
Replace a Cracked Vent Boot
Buy a new boot that matches the pipe diameter. From the roof, use a pry bar to pull out the nails holding the shingles to the boot, then pry the shingles back without removing them. Remove the nails holding the vent to the deck and lift the old boot out. Apply a thick bead of roofing cement to the bottom of the new boot flashing, slide the boot into place so the top and sides sit under the shingles, and fasten it at the corners and every 4 inches with washer head roofing screws. Cover every new nail head with cement, then nail the shingles back down.
Reseal or Replace Step Flashing
Step flashing is the series of short L shaped metal pieces where the roof meets a wall or a chimney. When a piece rusts or comes loose, water runs under the shingles instead of over them. Loosen the shingles near the flashing with a pry bar, remove the old piece, push a new piece into its place, secure it with roofing cement, and nail the flashing and shingles back down. Where flashing meets a brick wall, it must run up into the wall under counter flashing, with sealant at the seam as a second line of defense. With wood or cement board siding, the flashing goes behind the siding.
Patch a Small Shingle Area
For a few missing or cracked shingles, lift the shingle above the damaged one, remove its nails, slide the damaged shingle out, and slide a new shingle into place. Nail it at the top edge, cover the nail heads with roofing cement, and press the shingle above back down so its sealant strip bonds. Match the color and the exposure as closely as possible, and expect a new shingle to look slightly different until it weathers in.
When to Call a Roofer Instead
Call a professional when the leak involves a valley, a chimney rebuild, a skylight replacement, rotted decking, or more than one leak at a time. Call one too when the roof is steep, two stories or higher, or wet. A roof leak repair specialist can also find leaks that resist the attic and hose methods, using moisture meters and thermal imaging to trace water inside the roof assembly. Most roofers include the inspection in the repair price, while a standalone inspection typically costs $100 to $400.
Repair or Replace: How to Decide
Repair makes sense when the roof is under 15 years old, the damage is limited to one area, and the decking underneath is sound. A single failed boot or a patch of lifted shingles fits this case, and a repair that costs a few hundred dollars can add years to a roof that still has life left.
Replacement is the better choice when the roof is near the end of its life, shingles are curling or losing granules across large areas, or leaks keep returning in different spots. Sagging sections point to rotted decking and should be inspected promptly. HomeGuide suggests replacing rather than repairing when the roof is over 20 years old, the estimate tops $3,000, or damage covers more than 25 percent of the roof.
Two rules of thumb help with the decision. First, if repair costs reach 30 to 40 percent of a new roof, further patching rarely pays off. Second, if the roof is already past the age in the table below, money spent on repairs is money spent on a roof that will need replacing soon anyway.
| Roof material | Typical lifespan | Repair or replace |
|---|---|---|
| Asphalt shingles, 3 tab | 15 to 20 years | Replace near 20 years |
| Asphalt shingles, architectural | 20 to 30 years | Replace near 25 years |
| Metal roof | 40 to 70 years | Repair unless widely damaged |
| Clay or concrete tile | 50 years or more | Repair, replace broken tiles |
| Slate | 50 to 100 years | Repair, replace broken slates |
| Flat roof membrane | 20 to 30 years | Replace near 25 years |
For the metal and flat roof numbers in context, see our guide to how long a metal roof lasts and the roof membrane pillar guide, which compares all five membrane families. For flat roofs specifically, the flat roof waterproofing guide covers the inspection routine that catches membrane leaks before they reach the ceiling. A commercial roofing contractor can quote both a repair and a replacement for a flat or low slope roof, so the comparison is on paper before any work starts.
Does Homeowners Insurance Cover a Leaking Roof
It depends on the cause, and on the policy. Most policies cover sudden damage, such as a tree falling on the roof or wind tearing off shingles, along with the interior water damage that follows. They typically exclude leaks caused by wear, age, or lack of maintenance. A pipe boot that split after 14 years of sun exposure is a maintenance item. The same roof torn open by a storm is a covered event.
Deductibles commonly range from $1,000 to $2,500, or 1 to 2 percent of the home value for wind and hail claims. That matters for the math: a $700 pipe boot repair is below most deductibles, so it is not worth claiming. A $4,000 leak with interior damage is.
Document everything before the repair. Insurers pay claims on evidence, so build the file as soon as the leak is found.
- Dated photos and short videos of the drip, the stain, the ceiling, and the roof damage, taken before any repair work starts.
- The roofer written inspection report, with the cause stated plainly: storm damage, fallen limb, or failed flashing.
- Receipts for every temporary repair, including the tarp, buckets, and any emergency call out fee.
- A list of damaged belongings with photos and approximate values.
- The repair quote and the replacement quote side by side, if both were obtained.
Check the policy for the exact wording and the filing deadline, and file promptly. A warranty claim is a separate route: if the roof is still inside its material or workmanship warranty period, the manufacturer or the installer may cover the repair. Our guide to types of roofing warranties explains how to read those terms before signing anything or filing a claim.
How to Prevent the Next Leak
Regular upkeep keeps small defects from turning into interior damage. The routine below costs little and catches most leaks before they start.
- Clean gutters twice a year, in late spring and late fall, and more often under heavy tree cover.
- Inspect the roof from the ground each spring and after major storms, with binoculars, looking for missing shingles, lifted flashing, and sagging areas.
- Trim branches that touch or overhang the roof so they cannot scrape shingles or drop debris. Keep branches at least 3 feet from the roof surface.
- Replace pipe boots and renew flashing sealant every 10 years or so, before they crack.
- Add attic insulation and ventilation in cold climates to reduce ice dams.
- Check that exposed fasteners are covered with sealant, since an uncovered nail head rusts and leaks.
- Schedule a professional inspection every 3 to 5 years, and after hail or high wind.
- Watch the drip edge and the valleys after storms, since both are leak points that hide damage well. Our guide to what is a drip edge on roof shows what a sound drip edge looks like and where it fails.
A leak that is found in spring costs a few hundred dollars. The same leak found in winter, after months of slow soaking, can cost thousands. The inspection habit is the cheapest roof repair there is.
Frequently Asked Questions
How do I know if my roof is leaking? Look for brown stains on ceilings or walls, peeling paint or wallpaper, mold in damp areas, and dripping water during rain. In the attic, look for dark stains on the rafters, damp insulation, and daylight through the decking. A stain that grows after rain and shrinks as it dries is a leak. A stain that appears on cold, dry mornings is more likely condensation.
Why does my roof only leak when it rains hard? Heavy rain pushes water sideways and overwhelms small gaps that stay dry in light rain. Lifted flashing, loose shingles, and clogged gutters often show symptoms only in storms with wind. A leak that appears only in driving rain usually points to flashing or a wall joint rather than a hole in the middle of the roof.
Can a roof leak with no visible damage? Yes. Small gaps at nail heads, cracked sealant, worn pipe boots, and attic condensation can all let moisture in without anything looking wrong from the ground. A close inspection of the penetrations and the attic is the best way to find these.
How long can I wait before fixing a roof leak? Fix it as soon as possible, ideally within a few days. Water that stays in insulation and decking can start mold in 24 to 48 hours, according to the US Environmental Protection Agency, and rot raises repair costs quickly. A temporary tarp buys time but does not replace repair.
Is a leaking roof an emergency? Treat it as urgent. Water near light fixtures or outlets is dangerous, so turn off the power to that area at the breaker. A slow drip can usually wait a day or two for a roofer as long as you are catching the water, but a fast leak, a sagging ceiling, or water near wiring needs an emergency call the same day.
Can I fix a roof leak myself? Inside, yes: catch the water, protect the floor, and drain a bulging ceiling. Outside, only the simplest jobs, such as replacing a pipe boot or a few shingles on a dry, low slope roof, and only with a helper nearby. Leave valleys, chimneys, skylights, and steep roofs to a professional. Most falls happen on roofs that look easy.
Does a leak mean I need a new roof? Not usually. Most leaks come from one spot: a pipe boot, flashing, or a few shingles. An honest inspection tells you whether it is a repair or whether the whole roof is near the end. Replacement is the right call when the roof is past its lifespan, damage covers more than 25 percent of it, or repair costs reach 30 to 40 percent of a new roof.
Will insurance cover a roof leak? Only sudden damage is usually covered, such as a tree falling on the roof or wind tearing off shingles. Leaks from wear, age, or lack of maintenance are typically excluded. Document the damage with dated photos, make temporary repairs to prevent further loss, keep every receipt, and check the policy wording and filing deadline. The National Roofing Contractors Association publishes homeowner guidance on roof inspections and contractor selection that helps with both the repair and the claim.
A brown stain is a warning, not a decoration. Trace the water to its source, fix the failed detail, and check the roof twice a year after that. If the leak is active now, start with the first hour steps above, then get a roofer on site before the next rain. For a repair quote, a leak inspection, or a second opinion on repair versus replacement, talk to our roof repair team.